

Reworking My Large System

To many ads? Support ODJT and see no ads!
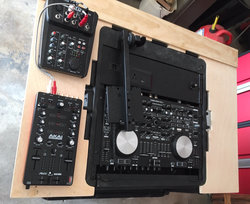
You’d think with all the audio cables I have around here, I’d have exactly what I need to hook up my little Alto mixer to my AKAI AMX... NOPE... well, not elegantly anyway. I needed to come out of L/R RCA (female) on the AMX to L/R 1/4” (female) on the Alto. Then I need to come out of the Alto with L/R 1/4” (female) to 1/4” TRS female on the patch panel. I don’t have the exact cables and lengths that I need, but I have it cobbled together for now with a series of cables and adapters. It’s times like this I really miss Radio Shack, where you could almost always find everything you needed pretty quickly. The best options now (for OKC) is Best Buy or Walmart, and neither carry a very extensive variety. That and it sucks to go there. I ordered what I need online and will have them in a couple of days... just not today. Guess I was lucky to have stuff I could cobble together to get by.[emoji4]
 
Last edited:
  • Like
Reactions: ittigger
It’s a darn good thing I’m not a measure once, cut twice kinda guy.[emoji1] I was out in the garage preparing to cut the tabletop out using the template I made, but I needed to cut an area out where the latches are taller than the rack top, so the tabletop can sit even with the top of the rack. Somehow, my measurements were off by an inch on one side, but I always double, even quadruple check the measurements before I do any cutting. Fortunately I got it fixed.

I also found some hinges that I think might work as fold-down brackets for my tabletop. I bought some stationary L -brackets because I thought those were the best option, but then I ran across these hinges in Ace Hardware the other day, and they look like they just might work. The tabletop is probably not thick enough for me to recess them into the wood so the sit flat, but at least it won’t have a hard metal bracket sticking down that could snag and hurt someone. Of course they’ll have to be painted.[emoji4]

Never was able to find my carbon paper stash, so I had to go to the office supply store and buy a package. They’re pretty proud of that stuff... $10.95 for just a few sheets. You get quite a few uses out of one sheet though if all you’re using it for is tracing a template. Still I need to put this pack away somewhere where I can find it when I need it.[emoji1]
 
Last edited:
  • Like
Reactions: ittigger
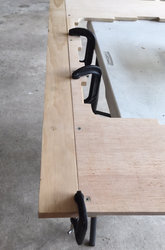
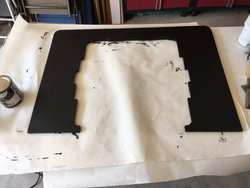
Got my tabletop cut...

94b4dbcaa9a09bccdafcc94192d2acdc.jpg

... took my time and only messed up a couple of cuts.[emoji1]... No big deal. Nothing I can’t fix with a little sanding. The next thing to do is to cut and attach the rear bracing piece and then get it all sanded down. Finally making a little progress.[emoji4]
 
Now I’m getting ready to attach the rear/back support...

91e30a445026d69a07b1a70c9c7359bf.jpg

I was gonna use a biscuit joiner, but I decided the plywood isn’t thick enough for that, so I’m doing a lap joint...

f56af97ad431057bf7616d1c00909e6a.jpg

... I’ll glue it and screw it, so it should be very strong.[emoji4]


Sent from my iPhone using Tapatalk
 
Got the back painted...

94712899e8fc9957c0923af64b2c929d.jpg

... I’m gonna stain the top side, but paint on the back and edges will cover those areas better I think. There’s a good side and a not-so-good side on this plywood, so I’m hoping the ebony stain will look nice on the top.

With it being so hot and humid out there today, I may not be able to finish this thing. It’s taking WAY too long for the paint to dry, and I can’t stay out there for very long either unless I want to sweat off 15-20 pounds.[emoji1] I think next trip I’ll paint the attachment hinges, though. Might as well try to make a little progress while waiting for the paint to dry.[emoji4]
 
OK... Got the top stained. Not too happy with it. Not exactly what I expected. I was hoping for something a little more transparent, but this stain is really more like paint, only streakier. Guess I need to give it a light sanding and put on another coat. It probably won’t look much different than the painted side, but that’s OK.[emoji4] As long as it looks good, I’ll be happy. It’s not dry enough to sand yet, and it’s WAY too hot out there to work anyway. It’s 6:30PM, so I’ll wait about an hour and go back out and see what I can do.

Besides, we just got back from our usual Saturday dinner out. I have a bit of a buzz. Only had two glasses of wine but it kinda got me.[emoji1] Probably a good idea if I refrain from using power tools until the affect wears off. And NO... I didn’t drive home... My wife did.[emoji4]

So before we left for dinner @ 4:30PM, I hung my sweaty clothes outside to dry... and they DIDN’T!!!... That’s HUMID!!!... Two hours later!!![emoji1] I’ll put ‘em back on anyway... been that kind of a day. When I was working out in the garage earlier, I was just workin’ away and a BUBBLE was ejected from my nose and floated gently down and landed on my arm. Amazed, I carefully creeped back into the house and displayed the large one inch diameter bubble to my wife, who was seated on the couch. She gazed at it with curiosity and asked; “Where did that come from?”... “OUT OF MY NOSE”; I exclaimed. “It’s a SNOT BUBBLE!!! we both roared with laughter.[emoji1]
 
Last edited:
... Guess I need to give it a light sanding and put on another coat...

Yep... That helped, but still not good enough. Unfortunately, in order to apply another coat, I need to go buy some more supplies. I think one more light sanding, and one more coat of stain is gonna do the trick. Tomorrow??? Not sure. Guess we’ll have to see.[emoji4]
 
  • Like
Reactions: ittigger
I went out in the garage to look at my tabletop this morning, and... it doesn’t look too bad...

478d791a0faf02f3dd53325b0ded8602.jpg

... One side looks better than the other though, and it’s still not as good as it could be, so yep... I’m gonna give it another light sanding and apply another coat of the stain.[emoji4]
 
  • Like
Reactions: ittigger
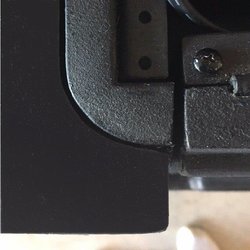
Time to turn my attention to the attachment hardware. I’m really quite pleased with the way this tabletop fits on the top of the rack. It actually fits so good that there is absolutely no movement from side-to-side or front-to-back. The primary reason for this stability is the way I curved the front of the tabletop around the front of the rack (up to the opening for the fold-down keyboard shelf)....

c91946dc7e267c907924b37fd15292ce.jpg

... That little curve just locks it in place. The only movement is if a lot of weight is placed on one side, which causes the other side to pop up. My initial idea was to mount four attachment hinges to the underside of the tabletop and use hand knobs to attach them to side of the rack. This is what I have right now...

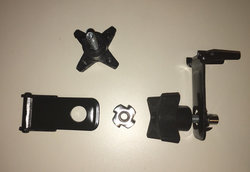
4521115e8702eb0a120336c874e28230.jpg

The hinges will fold up pretty flat against the bottom of the tabletop when not in use, and fold down at 90 degrees in order to be used to attach them to the side of the rack. The biggest problem is having to drill some major league holes in the side of the rack. I’ve done some pretty radical cutting and drilling on this rack already, but with the exception of the fold-down keyboard shelf modification, the other modifications are not visible from outside of the rack.

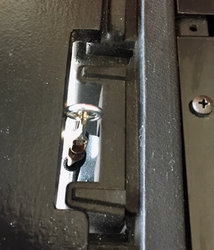
Not only am I concerned about drilling four big holes in the sides of my rack, I’m not convinced it’s even necessary. All I REALLY need is a way to keep the tabletop from lifting on either side if excessive force is applied to the opposite side, and I think that could be accomplished with a single knob and short metal bracket attached to the tabletop. What’s more, I think the knob should be screwed into one of the screw holes in the top rack rails. I couldn’t use the knobs I have, because they are 1/4 inch. I need a couple of 10/32 knob/screws to make this idea work. If I don’t have a couple around here somewhere, I can order them from Grainger and have them by Wednesday.
The bracket will be easy to make; shouldn’t take more than 15 minutes each.[emoji4]
 
Last edited:
  • Like
Reactions: ittigger
A bungie or strap looped around the side handles of the top rack and attached to the bottom side of the plywood should hold it down.
 
A bungie or strap looped around the side handles of the top rack and attached to the bottom side of the plywood should hold it down.

Sometimes the simplest solutions are the best!!!... I never even thought about a bungee strap solution.[emoji4]


Sent from my iPhone using Tapatalk
 
  • Like
Reactions: ittigger
Sometimes the simplest solutions are the best!!!... I never even thought about a bungee strap solution.[emoji4]


Sent from my iPhone using Tapatalk
I don't want to flaunt my simplemindedness ...
 
I don't want to flaunt my simplemindedness ...

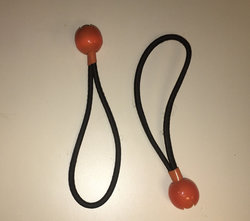
You should... it’s a great idea and costs me nothing!!![emoji1]... I already have these...

7a262781f681a69ee56afff1932f8842.jpg

... just need to add some kind of a hook, which I also have, and I’m good to go...

... I already tested them for size and they’re gonna work great!

THANKS!!!
 
Last edited:
Well that worked out quite nicely...

f9497b0b662fe991c8379b6d61895656.jpg

... from the top...

8f641e91754bfd0ddc76bd9cfba82990.jpg

Only took about 10 minutes. If I ever want to do it with brackets and knobs I can always do that. This method required NO mods to the rack, and just a couple of simple screw eyes and clips on the tabletop. I pulled the rack around the garage by the edge of the tabletop and it doesn’t budge. I even pressed down on both sides, and it took quite a bit of force to get it to lift, and even then it didn’t lift enough for the tabletop to slide off. Problem solved!!!

Thanks again for the great idea @steve149. Sometimes I over-complicate stuff![emoji1]
 
Last edited:
Got another coat of stain on the tabletop (after a light sanding) and this time I think I got. It looks real good... maybe not perfect, but as close to it as I think I can get it. Pictures coming when it dries.[emoji4]
 
Last edited:
  • Like
Reactions: ittigger