The beginning of this thread are Posts that I made to DJ Bobcat's "Re-Working My Large System", they are thread extracts from Bobcats thread. Hopefully, this one won't take as long. LOL Bobcat did a superb job of re-working his system. For background, see these posts:
Here are my initial postings from DJ Bobcat's Posting Re-Working My Large System. They have been linked here.
Today at 1:09 AM
#537
Bobcat...I started downsizing my small road case today; all external hardware and mounting two 4 space vertical mounting rails. Peeled back most of the black carpet that was attached to the sides of the road case so I can mark for cutting...next week. Headed out of town for wife's B-Day present (Beach trip).
I have a problem with the front and rear horizontal braces (wood) that stabilize the road case. When constructed they were recessed and glued (no screws)! I can't cut down the sides because the wood braces interfere with a straight cut. So, I'm going to cut the two braces off flush with the sides and then try to extract (chip or chisel) the indented leftover piece of brace, but not all because I will make the width of the brace footprint smaller. I don't know why they didn't just screw the braces from the outside. I mean they were covered by carpet anyhow. I'll take a picture of the case tomorrow before I begin. I may use screws to secure the braces, but won't use 3/4" plywood...maybe oak or some other hard wood.
On second thought, I may just cut the braces along their vertical edge to the width I want, then sabre saw horizontally from side to side. What's left will be enough to stabilize the case. You will understand better when I send the photos.
Last edited: Today at 1:19 AM
Today at 5:02 PM
#542
Bobcat...here are some photos of beginning of my project.


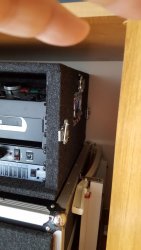
Carpet removed but still attached to bottom. Horizontal line in 1st Row, Picture 3 is where I was going to cut, but decided I needed more height to accommodate the foldout piano hinged lap shelf. You will see in subsequent photos where the revised cut line has been inscribed. Photo #3, above, shows the rabbited wooden support rail for the front of the road case. The support rail will be narrowed or deleted altogether.
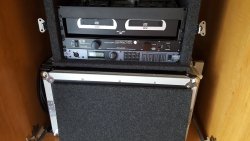
Below photos are of equipment installed for measuring purposes. The CD Mix II is sitting on a metal rack shelf (19" x10.5"); however, it doesn't have a front support edge to keep the CD Mix II from sliding forward. I've got to find a remedy. Also, the wooden front support brace for the case will need to be cut down or completely removed. I wonder if the 7" rack rails will be enough IF the support brace is removed? Also, I need to reduce the size of the rear wooden support brace, too.


 Picture #4, above, shows the two cut lines for flattening the top of the road case. The line closest to the CD Mix II was the initial cut line. The line above it is the revised cut line (runs from the front top edge of side). The Clamps in the pictures are temporary supports for determining horizontal cut lines and for temporary support for the Laptop shelf (piano hinged), next photos. Size of laptop shelf when open is 11-inch x 19". When shelf is closed it is 6".


Next #4, above, shows the current method of securing shelf to sides of the road case (upside down). I may use a wooden 1.5" x 1" piece of wood to support and secure the shelf, but that means adding more weight. Also, I may move the wooden support brace up to support the Laptop shelf when it is full extended. Seems like a good idea? Although it will be narrow in height than what is now shown.

Well that's all for today. I'll await comments and questions before I actually do an CUTTING. Kind of like measure 3 times but cut only once. LOL!
Oops! Somehow all of the photos that I uploaded got re-posted. Sorry~
Attachments
"
Here are my initial postings from DJ Bobcat's Posting Re-Working My Large System. They have been linked here.
Today at 1:09 AM
#537
Bobcat...I started downsizing my small road case today; all external hardware and mounting two 4 space vertical mounting rails. Peeled back most of the black carpet that was attached to the sides of the road case so I can mark for cutting...next week. Headed out of town for wife's B-Day present (Beach trip).
I have a problem with the front and rear horizontal braces (wood) that stabilize the road case. When constructed they were recessed and glued (no screws)! I can't cut down the sides because the wood braces interfere with a straight cut. So, I'm going to cut the two braces off flush with the sides and then try to extract (chip or chisel) the indented leftover piece of brace, but not all because I will make the width of the brace footprint smaller. I don't know why they didn't just screw the braces from the outside. I mean they were covered by carpet anyhow.
 I'll take a picture of the case tomorrow before I begin. I may use screws to secure the braces, but won't use 3/4" plywood...maybe oak or some other hard wood.
On second thought, I may just cut the braces along their vertical edge to the width I want, then sabre saw horizontally from side to side. What's left will be enough to stabilize the case. You will understand better when I send the photos.
Last edited: Today at 1:19 AM
Today at 5:02 PM
#542
Bobcat...here are some photos of beginning of my project.


Carpet removed but still attached to bottom. Horizontal line in 1st Row, Picture 3 is where I was going to cut, but decided I needed more height to accommodate the foldout piano hinged lap shelf. You will see in subsequent photos where the revised cut line has been inscribed. Photo #3, above, shows the rabbited wooden support rail for the front of the road case. The support rail will be narrowed or deleted altogether.
Below photos are of equipment installed for measuring purposes. The CD Mix II is sitting on a metal rack shelf (19" x10.5"); however, it doesn't have a front support edge to keep the CD Mix II from sliding forward. I've got to find a remedy. Also, the wooden front support brace for the case will need to be cut down or completely removed. I wonder if the 7" rack rails will be enough IF the support brace is removed? Also, I need to reduce the size of the rear wooden support brace, too.


 Picture #4, above, shows the two cut lines for flattening the top of the road case. The line closest to the CD Mix II was the initial cut line. The line above it is the revised cut line (runs from the front top edge of side). The Clamps in the pictures are temporary supports for determining horizontal cut lines and for temporary support for the Laptop shelf (piano hinged), next photos. Size of laptop shelf when open is 11-inch x 19". When shelf is closed it is 6".


Next #4, above, shows the current method of securing shelf to sides of the road case (upside down). I may use a wooden 1.5" x 1" piece of wood to support and secure the shelf, but that means adding more weight. Also, I may move the wooden support brace up to support the Laptop shelf when it is full extended. Seems like a good idea? Although it will be narrow in height than what is now shown.

Well that's all for today. I'll await comments and questions before I actually do an CUTTING. Kind of like measure 3 times but cut only once. LOL!
Oops! Somehow all of the photos that I uploaded got re-posted. Sorry~
Attachments

LapShelf Upside down .jpg
605 KB Views: 3
Left Side - Front to Back.jpg
286.3 KB Views: 3
Right Side - Front to Back.jpg
345.9 KB Views: 3
Shelf Open unsecued.jpg
582.4 KB Views: 3
LapShelf Upside down .jpg
605 KB Views: 2
LapShelf Folded for Transp (unsecured).jpg
512.6 KB Views: 2
LapShelf Overhead View (unsecured).jpg
410.6 KB Views: 2
LapShelf Unsecured Resting on CD Mix II Output Jacks.jpg
601.3 KB Views: 2
Left Side - Front to Back.jpg
286.3 KB Views: 1
Right Side - Front to Back.jpg
345.9 KB Views: 1
Shelf Open unsecued.jpg
582.4 KB Views: 1
"
Last edited:


